Key Takeaways
- Apple released a native tool to easily transfer Apple Music playlists to YouTube Music.
- To use the tool, you need an active Apple Music subscription and YouTube Music account.
- The transfer is quick, but you can’t choose playlists or transfer to other platforms.
Transfering your playlists from Apple Music to YouTube Music has always been possible through third-party tools. But now—finally!—Apple is launching a native tool that simplifies the process.
Available on Apple’s Data and Privacy site, the native playlist transfer tool is similar to the iCloud photo library transfer tool for transferring photos to Google Photos. It’s free to use and makes switching to YouTube Music easy.
Here are a few things you should know about the tool:
- You need an active Apple Music subscription, and an active YouTube Music account to transfer your playlists.
- You can only transfer the Apple Music playlists that you own. This includes both playlists created by you as well as your own collaborative playlists.
- Any other playlists, such as non-collaborative shared playlists and curated playlists, can’t be transferred.
- You can’t transfer playlists that contain anything other than songs, such as podcasts, audiobooks, or uploaded audio files.
- You can’t transfer music files individually.
- You can’t transfer folders you’ve organized your Apple Music playlists into.
- If a song on your Apple Music playlist isn’t available on YouTube Music, it won’t be included in the transferred playlist.
- When you transfer your playlists to YouTube Music, they’re still available on Apple Music.
Unfortunately, there are a few restrictions, but the tool is still super useful.
How to Transfer Your Apple Music Playlists to YouTube Music
Apple has made its playlist transfer tool incredibly easy to use.
- Head to Apple’s Data and Privacy site in a web browser.
- Log in to your Apple Account. On the Manage your data page, click on Request to transfer a copy of your data.
- Under Choose what you would like to export on the next page, click on Apple Music playlists and hit Next.
- The tool will analyze your Apple Music account and tell you the number of playlists you can transfer. Hit Continue.
- Next, it’ll ask you to choose the Google account you use for YouTube Music. Select one and click Continue to grant Apple Data and Privacy access to your account details.
- Check off the checkbox for View and manage your YouTube Music data under Select what Apple Data and Privacy can access and hit Continue.
- On the Confirm your export to YouTube Music page, click the Confirm Export button.
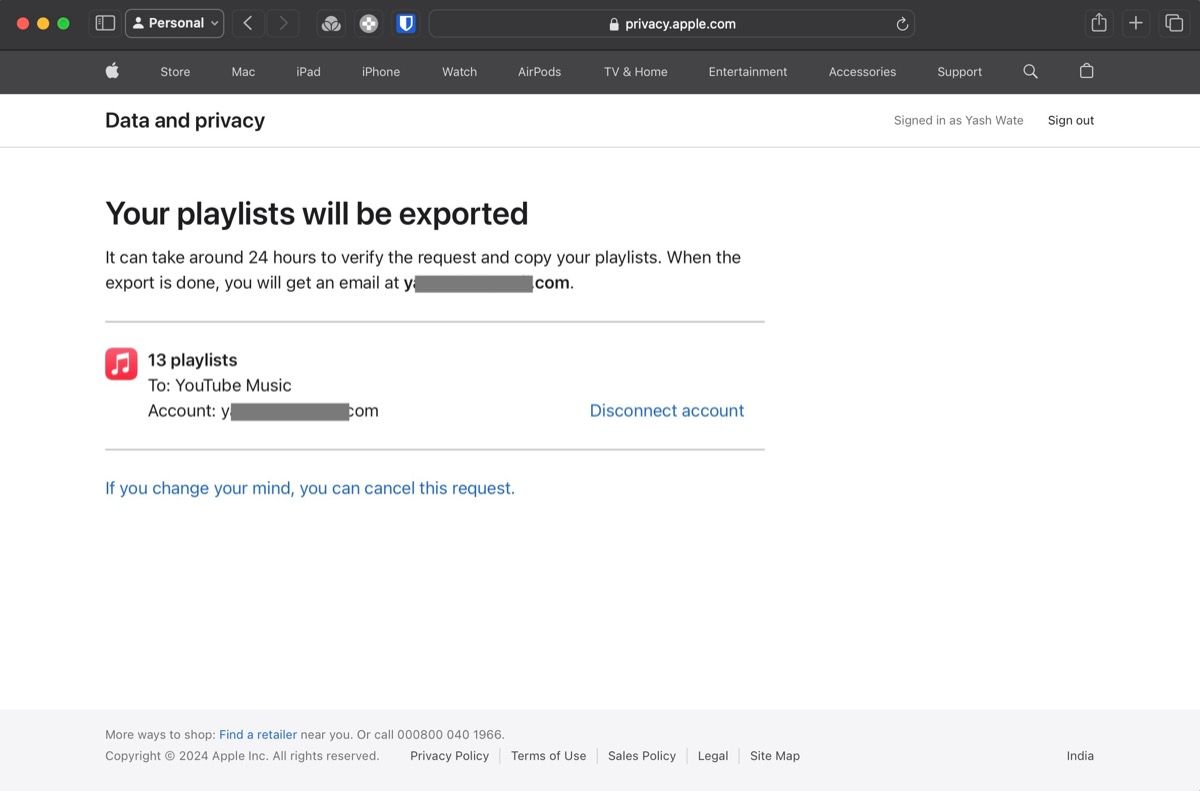
Once you make the request, Apple says the tool may take up to 24 hours to verify the request and complete the transfer; the time depends entirely on how many playlists you’re transferring. I had 13 playlists on my Apple Music account, and the tool transferred them in about 10 minutes. When the transfer is complete, you’ll get a notification on your Google account. Go to your YouTube Music account to verify.
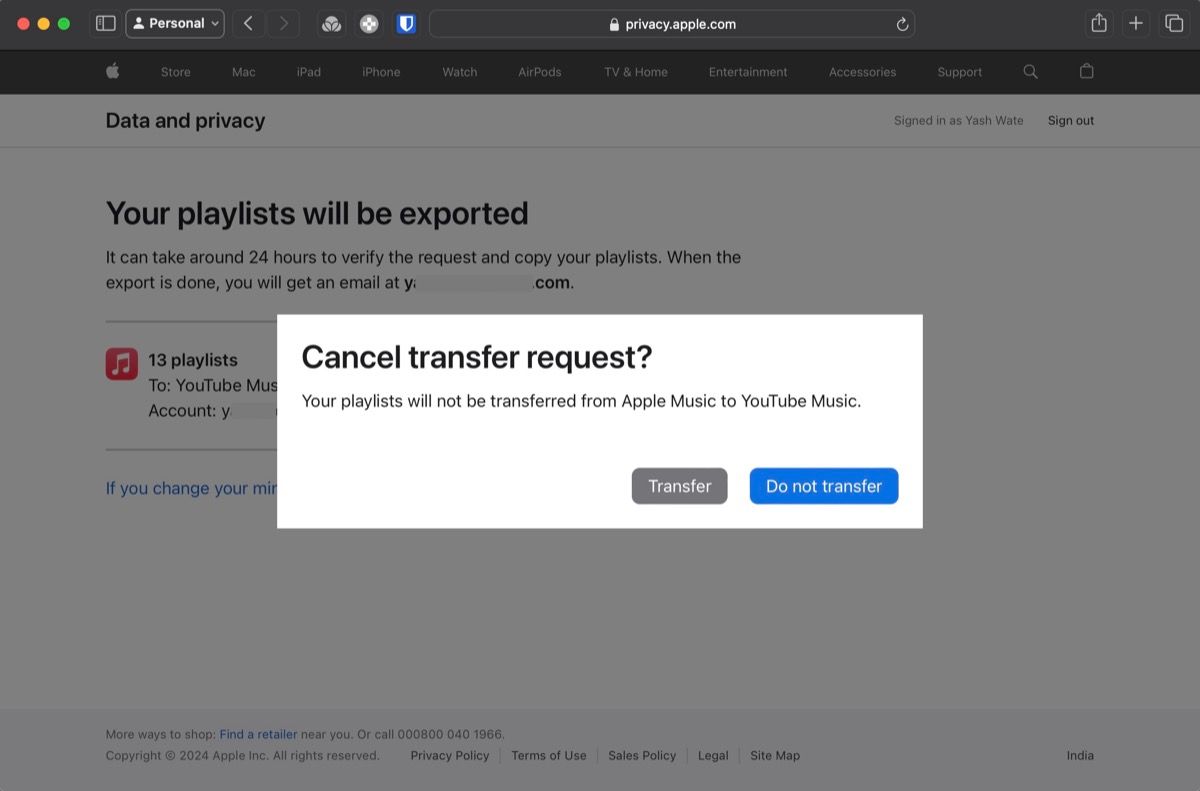
At any point, if you want to cancel the request, click on If you change your mind, you can cancel this request on the Your playlists will be exported page.
Then, hit Do not transfer on the confirmation prompt to cancel transferring the playlists to YouTube Music.
Apple’s native tool makes switching to YouTube Music easier than ever. The tool is surprisingly fast, and the transfer happens in the background, so you don’t need to keep the browser open for the process to complete.
That said, it isn’t perfect. For one, it doesn’t let you choose which playlists you want to transfer, requiring you to clean up your YouTube Music library later to remove the playlists you don’t need. And two, it’s limited to transferring playlists to YouTube Music only, so those wanting to switch to Spotify will still need to rely on third-party tools to move their playlists over. I hope Apple brings these functionalities at some point.
