


As the famous saying goes: “smart people back up”. OK, we just made that up, but it should be a famous saying, and it’s very much the right thing to do. So here’s how to back up your iPhone and/or iPad.
Our advice is to back up your Apple devices today, and keep doing so – automatically to iCloud and/or regularly to your Mac or PC. Many devices fail every single day, often without warning. Don’t let your data be consigned to oblivion when there’s really no need.
This is especially important if you run beta software. There’s loads of great stuff in the iOS 26 and iPadOS 26 betas Apple has unleashed ahead of September. But if you mash that install button without first protecting your data, don’t be surprised if your enthusiasm returns to smack you in the face. So, again, back up your important iOS and iPadOS data. Before we get really grumpy.
Stick with it: iOS 18
Not so keen to live at the cutting edge? Unsure whether your device will cope with a new OS? You’re in luck: even when a new OS is fully baked, Apple provides the choice between two software update versions in Settings. Go to Settings > General, then tap Software Update. You’ll see the shiny new option and – when they’re available – bug and security fixes for the previous version. Choose the one you want to install.
How to backup to iCloud
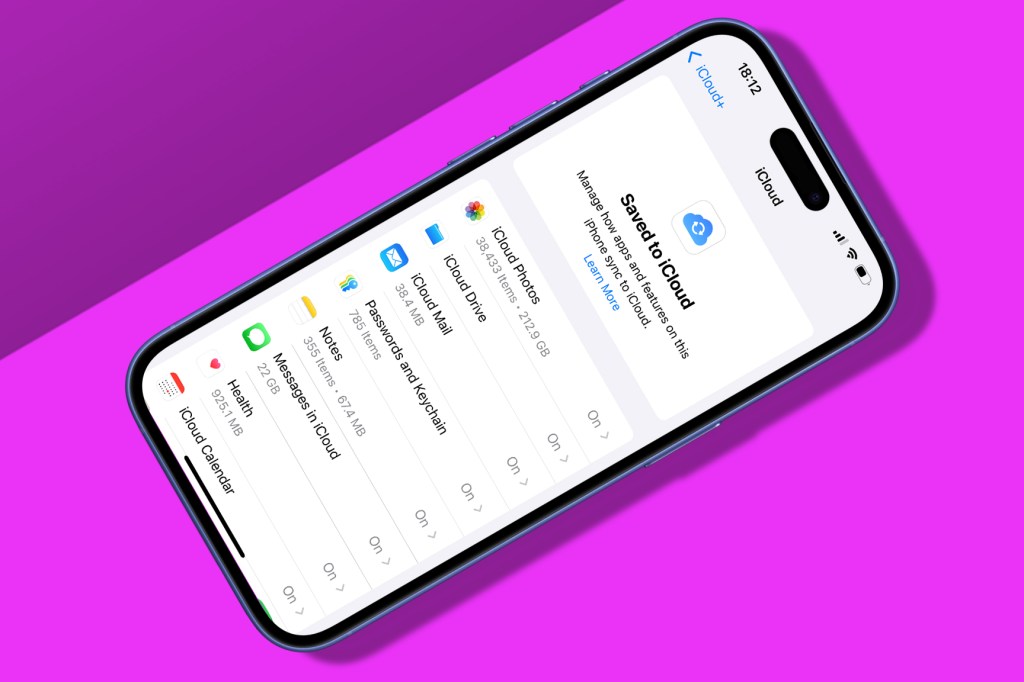
Head to Settings > [your name] > iCloud > ‘Saved to iCloud’. Turn on relevant options that aren’t activated to keep important data safe, such as calendars, reminders, and browser bookmarks. This will now be synced to iCloud. Even if an update turns your iPhone/iPad into a pretty brick (unlikely), you can download this data to another device (and access it at icloud.com in the meantime).
Next, head to ‘iCloud Backup’, tap ‘Back Up Now’, and enter your password. If you don’t use your device much, it’ll start backing up. (Be on Wi-Fi, unless you hate yourself.) If you’ve loads of apps that store a ton of data locally, you’ll need to buy more iCloud space, because Tim Cook needs a new yacht and only gives you a miserly 5GB for free.
Buy more storage in iCloud > ‘Manage Storage’ > ‘Change Storage Plan’. Alternatively, head into Backups, choose your device, and figure out if there’s any data you can do without if everything goes wrong. Oh, and iCloud back ups take ages, so don’t do this at the last minute.
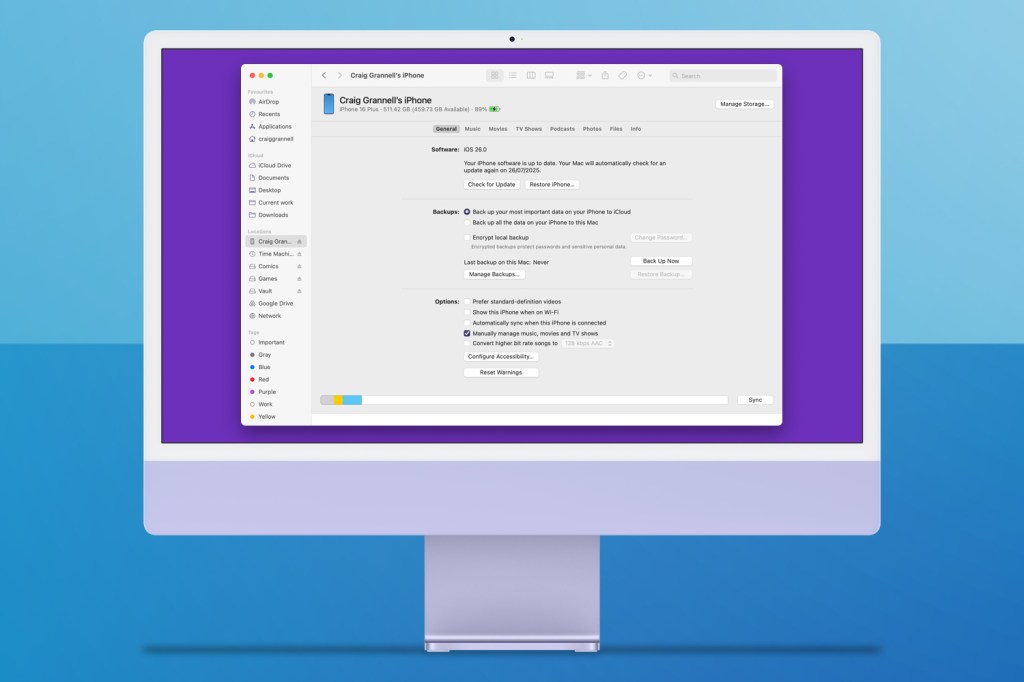
How to back up to Finder or iTunes
If you’re on Windows, this option involves iTunes. Sorry. Connect your device to your computer using a cable, and select it in the iTunes toolbar. Select Summary from the sidebar that then appears. Under the Backups section, you’ll see when you last backed up, and where that back up went. Unless you usually don’t back up, in which case hang your head in shame and continue.
Click ‘Back Up Now’. This backs up your device data to your computer, and you can later recover from this backup, in the event of disaster. We strongly recommend using the Encrypt option, so your Health app data and passwords go along for the ride. (You’ll need to enter a bespoke password to get at that backup later. Note that down somewhere safe.) Again, the process isn’t swift, but it is necessary. Relying solely on a single iCloud backup as a disaster recovery system is brave. And by ‘brave’ we mean ‘bonkers’.
If you’re a Mac user, iTunes has long been consigned to history. Hurrah! Only the process is almost identical and now instead lurks in Finder – select your device from Locations, choose the General tab, click ‘Encrypt local backup’ and then ‘Back Up Now’. Well, assuming you’re using macOS 10.15 or later. Earlier Macs will still have iTunes.
How to backup iPhone and iPad photos and videos
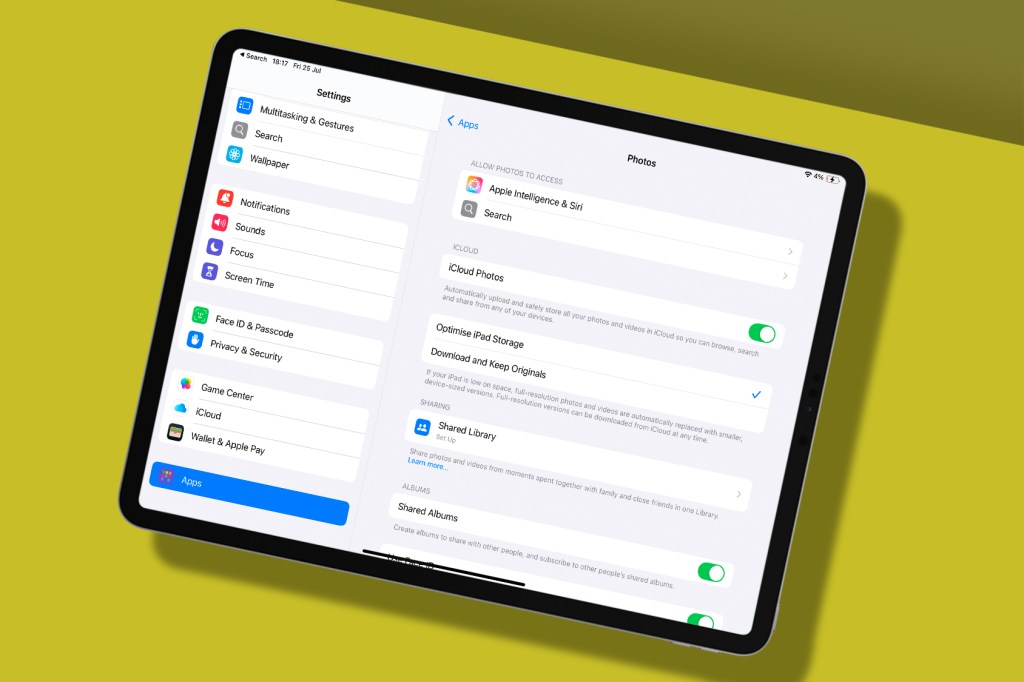
Your phone’s full of photos that help you recall precious memories (or painful drunken ones), and so don’t risk losing them. Apple provides options for keeping pics and videos safe. Ideally, just turn on iCloud Photos (in Settings. > Apps > Photos), which syncs your entire photo library (videos, photo edits and all) to iCloud. You’ll need enough iCloud storage for everything you’ve shot – and the patience of a saint while it uploads.
However, iCloud syncs don’t always work perfectly, so consider going old-school again as well. Plug your device into your computer. If you’re using a Mac, use Photos to import copies of your photos and videos. Make sure in Photos > Settings > iCloud, you have ‘Download Originals to this Mac’ turned on. Should your library be larger than your local storage, consider placing it on an external SSD (Settings > General > ‘Library Location’) and back that up regularly.
If you’re using a PC, use the Windows Photos app, or right-click your device in File Explorer, select ‘Import pictures and videos’, and follow the wizard.


